Flashing ESP32 Firmware
Download
Here you can download the script flash.cmd for flashing the ESP32 firmware and the test program.
Preparation
- Connect the ESP32 board to a USB cable with the PC
- Install driver for the board https://www.silabs.com/developers/usb-to-uart-bridge-vcp-drivers?tab=downloads
- Find out the right Com Port in the device manager (look for ‘Silicon Labs CP210x USB to UART Bridge’)
- Unpacking the zip archive
- Start from flash.cmd
Flash.cmd
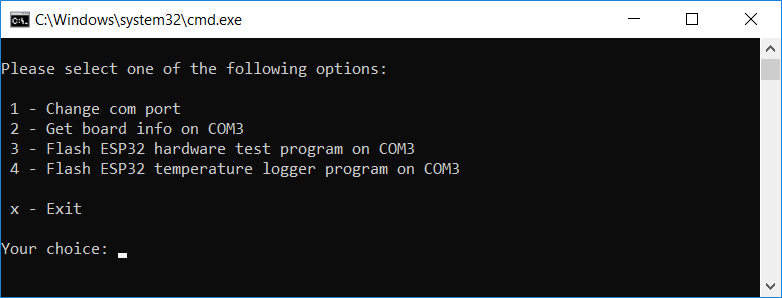
Menu

Menu item 1 – Change com port

Menu item 2 – Get board info
- This menu item reads general information from the board. Folding this test has been set the right Com Port.
- Warning: For some boards, the boot button must be pressed if ‘ Connecting …__’ is printed out on the console so that the flashing is possible. The boot button is the button next to the ‘En’ button. For the smaller board type, the boot button is on the back.

Menu item 3 – Test firmware flashing
- With this menu item, the test firmware is flashed, which is the firmware for testing the SD card and the sensors.
- Attention: There are boards where the boot button must be held down during the output of ‘Connecting…__’ on the console. This button is sometimes labeled ‘boot’ and is next to the ‘En’ button.

Menu item 4 – Temperature logger firmware flashing
- Menu item 4 flashed the temperature logger firmware.
- Warning: For some boards, the boot button must be pressed if ‘ Connecting …__’ is printed out on the console so that the flashing is possible. The boot button is the button next to the ‘En’ button. For the smaller board type, the boot button is on the back.

